We love strawberries. LOVE. On average, we eat about 2 pounds of them a week, between fresh and frozen berries. My son loves strawberry shakes (bananas, frozen strawberries with some water to blend with), and he likes to eat them plain fresh or frozen. I’ve had strawberries in the ground for about three years now, but my garden (aka my available land area) doesn’t have the space to grow a significant amount of berries (and by significant, I mean we’ve never had more than 3 or 4 ripe berries at a time).
But I came across this blog post from 100 Dollars a Month (my favorite new gardening blog) showing off someone’s strawberry tower, and I knew that I had to try this out.
I went online to Gurneys (I tried a few other places first, but they were sold out of strawberry plants at the late date), and ordered 100 everbearing strawberry plants. They arrived during my no-buy week, so instead of going out immediately and purchasing cedar wood to build my new strawberry tower with, I used some 1 x 6 pine that I had on hand.
The first tower I built on Sunday was 6 feet tall, but I had leftover plants, so I decided to build another one, and today (Thursday) was when I got around to doing it.
You’ll need:
4 boards, cedar fence boards are cheap and should last longer than the pine that I used
2 2×3 or 2×4 scraps (about 18 inches long) to use as support legs
landscaping fabric to cover the bottom-you could use a board with holes in it too, but I had the fabric, so it seemed simplier to just use that
Drill bit (spade, forstner, hole saw) measuring about an inch and a half for the holes
Drill to drill holes and screw it all together
Screws, preferably exterior screws, though I didn’t have any so I just used drywall screws
1. Cut your boards to the length that you want your tower to be high. My first tower was 6 feet tall. The second one was only four feet tall, because I only had about 30 plants left.
2. Drill the holes in three sides. I staggered them about 4 inches apart (though I didn’t do any measuring). And leave eight inches or so at the bottom, so your plants aren’t growing on the ground. I left one side without holes, because that side would probably not get much sun as I plan to keep these near the house to save them from the deer.

4. Screw the boards together into a box shape. Pre-drill your holes so your wood doesn’t split. I put screws in every 18 inches or so.
5. Once you have the box done, spread the landscaping fabric over the bottom and either staple it onto the wood, or use the support legs to hold it on when you screw them on.

6. Screw the 2 by’s on two sides so they are even with the bottom of the box to keep it from tipping over.
Now you are done the box, and you need to fill it with some sort of growing medium. And of course plant your strawberries in it.
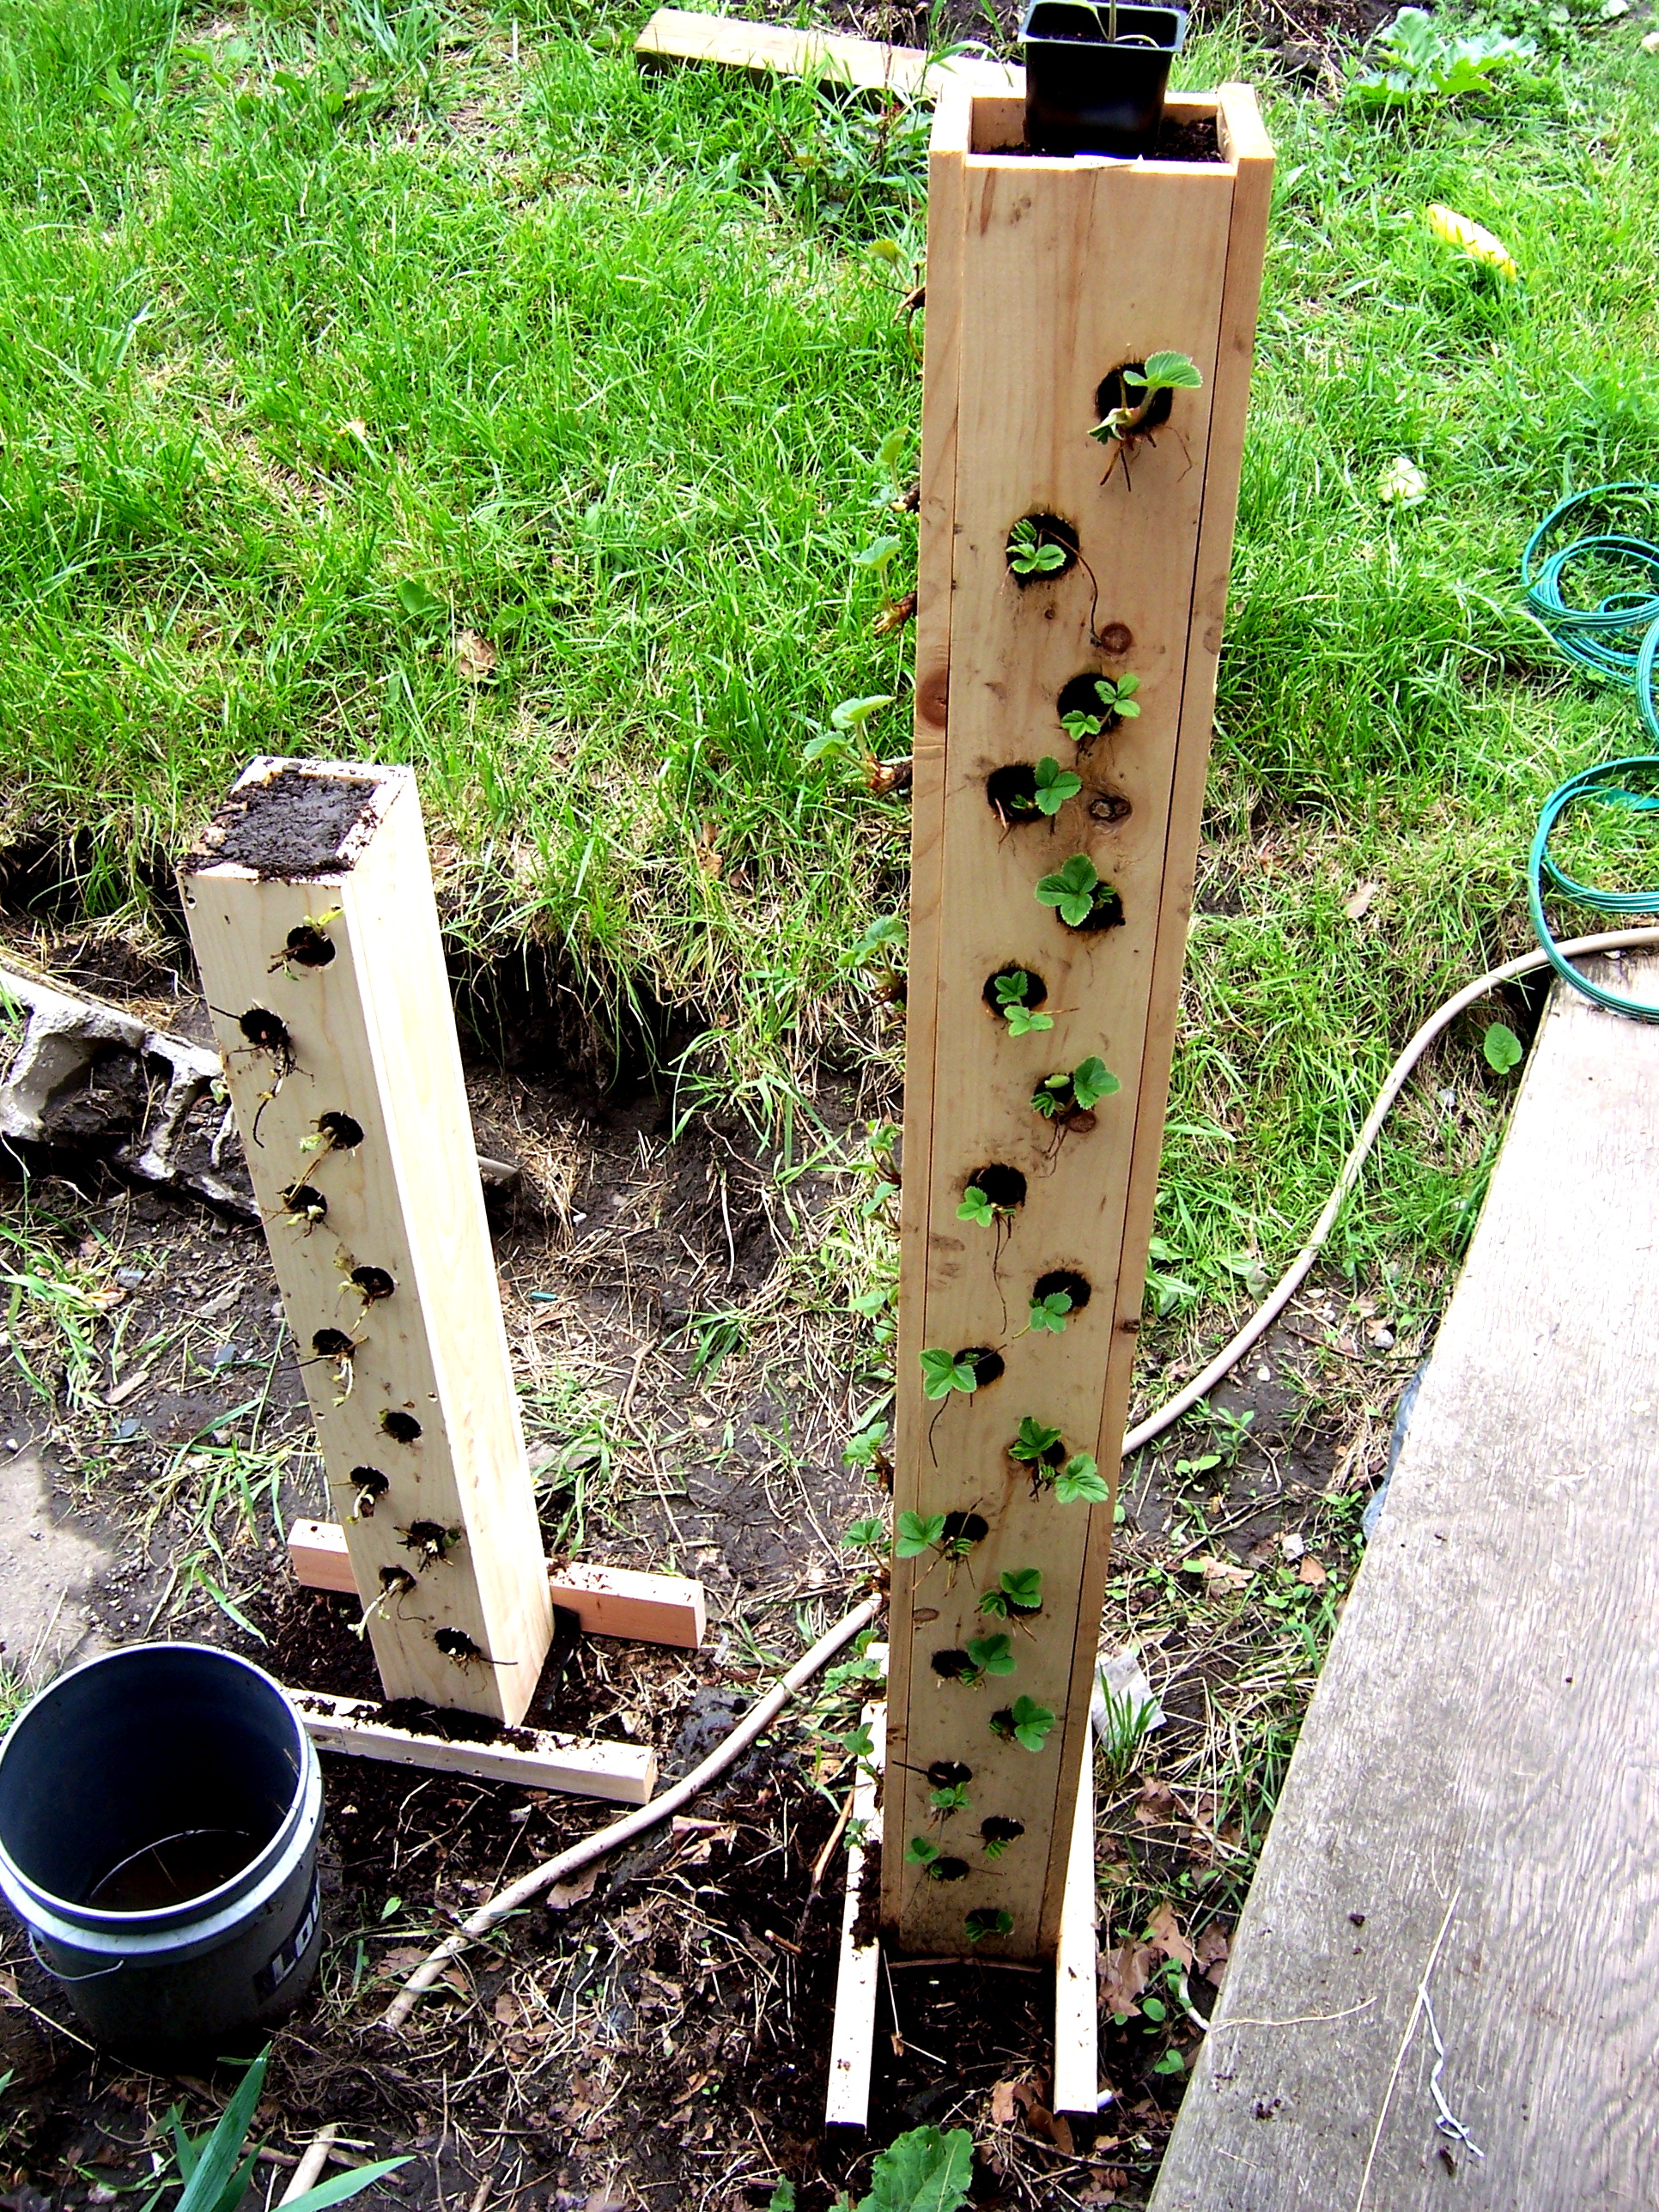
For my first tower, I filled the whole thing up and then added the plants. I also didn’t pack down the soil as I went, so there were some air pockets in the bottom half that I had to fill by trying to squish soil in through the holes. I don’t recommend this.
The second time, I put the plants in as the soil got up to the holes, and then gently tamped the soil down as I went.
For my growing medium, I used straight compost. The six foot tower took about 8 gallons of compost (measured by filling up my five gallon bucket there). The four footer took only slightly more than one bucket. If I didn’t have large quantities of compost available from my compost bins, I probably would have gone with potting soil.
I’ll keep you updated on the strawberries growing progress. So far in four days, the plants are already leafing out nicely.
If you search the web, there is also a strawberry tower that is made of a PVC sewer pipe with holes drilled in it, if you aren’t a woodworker, that will be easier for you. In that case, you should definitely get a hole saw drill bit for the holes.

Let me know what you think and definitely let me know if you have ever tried this before.


